As the biggest and the most popular video sharing website, people can upload their favorite videos to share with friends and family, and we can also watch our favorite, most hit movies, but also can listen to beautiful music. So it impressed us in the visual and auditory as one of our favorite platform. YouTube has gained a lot of people's favor with an incredible speed. And also YouTube supports a wide range of file formats like MOV, MP4, AVI, WMV, FLV, 3GP, WebM, MPEG4, etc. but DVD of VOB format is not included. So if you want to put DVD (both commercial DVD and homemade DVD) clips to YouTube, you need to convert DVD to YouTube friendly file format.

To successfully complete the task, a DVD converting program is essential. Some freeware like Handbrake can do such a job as long as the DVD is not encrypted. And as we know that YouTube only supports uploading videos within 15 minutes and no more than 2GB, so here comes another limitation of Handbrake: it doesn't have the editing function to edit DVD to meet the uploading requirements. Considering this, you may want a more professional DVD converter, which can convert DVD to VOB format and other formats that supported by Youtube, and it can handle a wide variety of video and DVD disc including protected by various coding, the most important thing is that it should have editing functions, the ability to edit our video to meet the Youtube requirements. There is a lot of DVD converting program able to meet the above requirements, but can best do them, of course, is Pavtube DVDAid. Learn more about this software ....
Here is the easy-to-use guide:
Step 1: Directly download Pavtube DVDAid from here. Install and drive it.
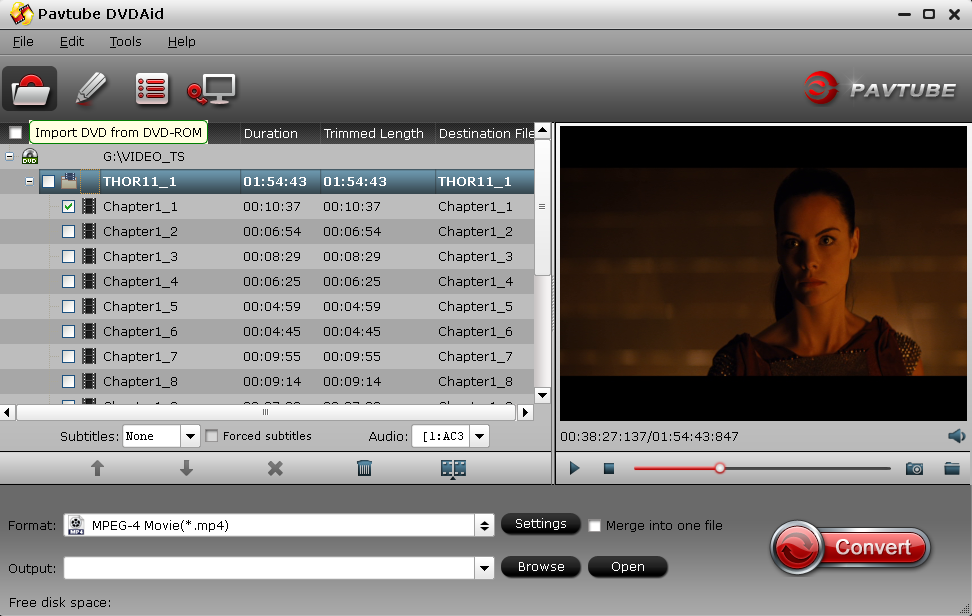
Step 2: Click "Folder button" after placing the DVD disc into DVD-ROM to load DVD files.
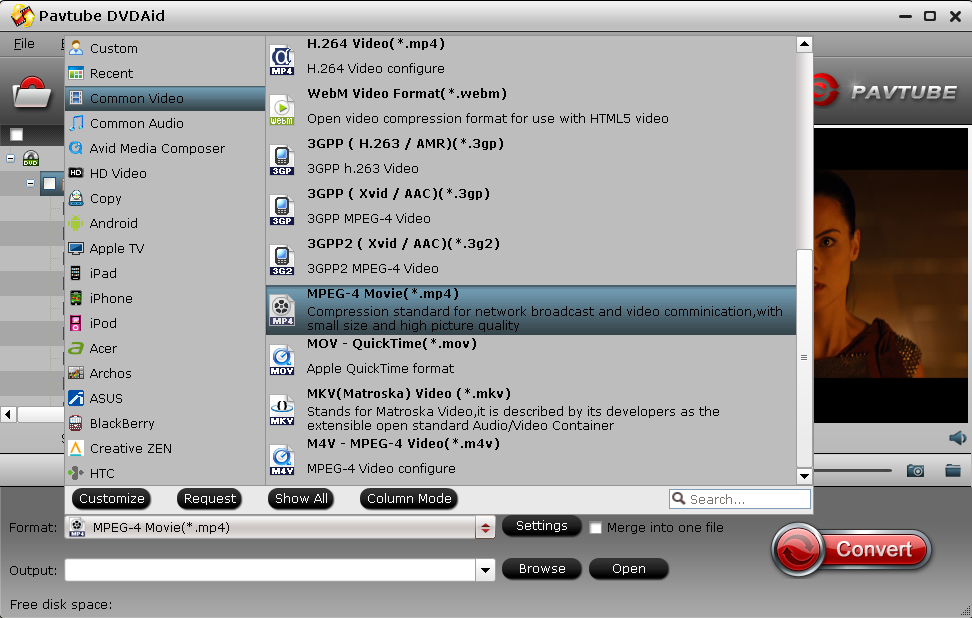
Step 3: Extend the pull-down menu Formate, and then find the "Common Video" and select "MPEG-4 Movie(*.mp4)" as output format. MP4 is the widely used network video streaming media format with smaller size and high picture quality. If you are an experienced user, you can press the Setting button to adjust the resolution, video bitrate, frame rate, etc. to reach a balance between the video size and quality.
Step 4: Before conversion, we should specially mention the editing function as YouTube has the special requirement of video duration and size.
Hit on "Edit" icon to trim video length. You have two options: input the start time and end time you want to clip into the boxes. Or simply move the sliders on the slide bar to set the start and end point of the clipped part. Then click OK to save the change.
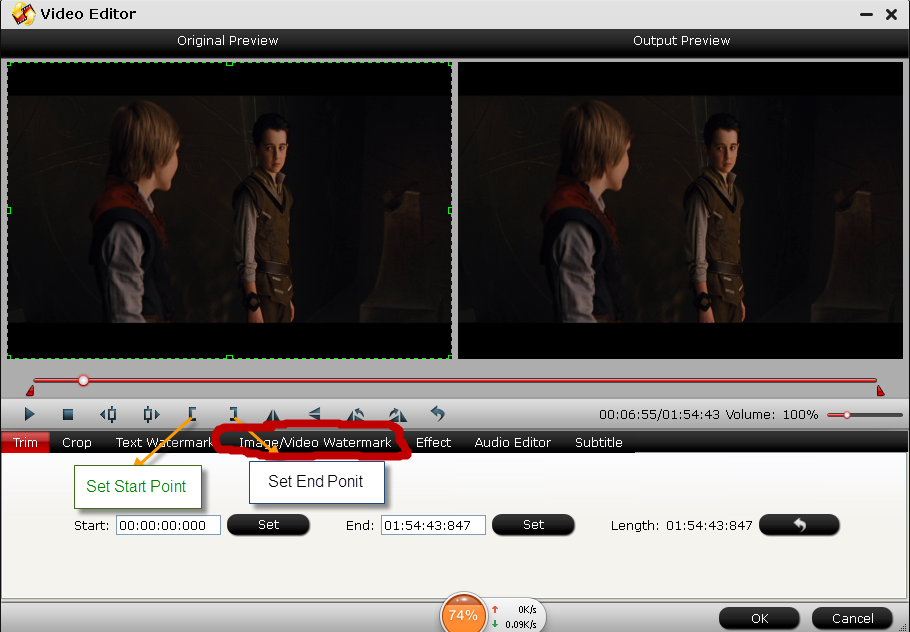
You also can crop the black border, add text/image watermark, and adjust the brightness, contrast, saturation, hue and volume to make a unique video of your own features.
Step 5: When you are satisfied with all the settings, hit "Convert" button to start converting DVD to YouTube. When done, you feel free to upload the converted DVD video to YouTube. Easy, isn't it?
How to upload videos to YouTube?
Step 1: Go to YouTube
Step 2: Login your account and click the "Upload". If you have no account, you can register one.
Step 3: Fill related information about the video you uploaded. The more information you fill, the easier it is to find your video for users.
Step 4: Click the yellow button "Upload" to start uploading your video.
Once the video is published, you can browse the video or share it with friends with the URL YouTube provided at random
More Articles
Backup Existing DVD to NAS server for movie enjoyment
Store DVD Collection on Cloud Storage and Share with Family
Copy DVD disc to any formats supported by many devices
No comments:
Post a Comment